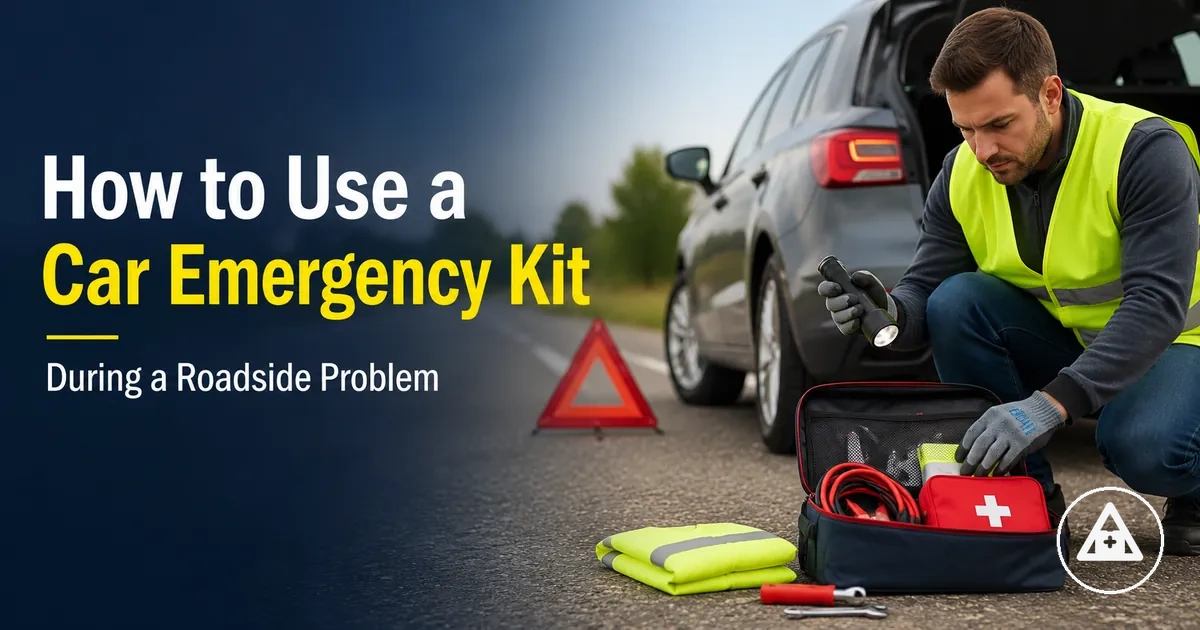
How to Use a Car Emergency Kit During a Roadside Breakdown
Using a car emergency kit during a roadside breakdown starts with visibility, limited roadside actions, and knowing when to call for help. The kit can support safe use with hazard lights, a flashlight, a warning triangle, gloves, a tire inflator, and jumper cables, but safety-first use comes before any tool.
A roadside problem does not automatically mean every kit item should be used. Traffic, shoulder space, weather, light, passengers, and vehicle condition control what the driver should do next. If the roadside situation makes movement, inspection, or tool use unsafe, the safer decision may be to create visibility and call for help before opening the kit.
The practical sequence is to assess the roadside breakdown, make the vehicle and driver visible, choose only the kit item that matches the immediate problem, and stop when the condition is beyond temporary help. A tire inflator may help with low tire pressure only when the tire condition is suitable, while jumper cables depend on a safe battery setup and vehicle manual guidance. Gloves can support a minor task around sharp edges or dirty items, but they do not turn the kit into a repair solution.
A car emergency kit is roadside support, not a substitute for emergency services, professional roadside help, or full vehicle repair. When visibility is poor, traffic exposure is high, the vehicle condition is unclear, or the tool does not match the problem, the kit’s role is to support the decision to stop and call for help.
Check the Roadside Situation Before Opening the Kit
Assess traffic and personal safety before opening the kit during a roadside situation. A car emergency kit is most useful when it can be accessed without increasing risk. Traffic exposure is the deciding factor.
If the breakdown location has limited shoulder space, poor visibility, heavy traffic flow, or severe weather, safe kit access may be restricted. Passengers, road layout, and the stopping area can also change the level of traffic risk. In these conditions, the priority may be visibility and outside help rather than immediate kit use. The roadside situation should guide the decision.
- Check vehicle position before reaching for kit items.
- Assess shoulder space and traffic flow around the stopping area.
- Confirm visibility conditions, including darkness, rain, fog, or other weather factors.
- Consider whether passengers are protected from traffic exposure.
- Decide whether the roadside problem appears minor or whether outside help is the safer option.
Safe kit access is more reasonable when the vehicle position reduces traffic exposure and movement can be made with lower risk. If conditions allow, the driver can retrieve only the items needed for the immediate situation. For broader preparation and equipment context, see the car emergency kit hub.
fast kit access depends on storing the kit where commonly used items are reachable with safe movement. Quick access can support visibility and decision-making, but it should not encourage actions that increase traffic risk or reduce personal safety.
Move the Vehicle Away From Traffic When Possible
Move the vehicle only when vehicle control is maintained and a safe, lawful stopping area is available. If steering, braking, terrain, or surrounding traffic creates additional risk, moving the vehicle may not be appropriate. The image below clarifies how a safer vehicle position can improve distance from moving traffic and support safer kit access.
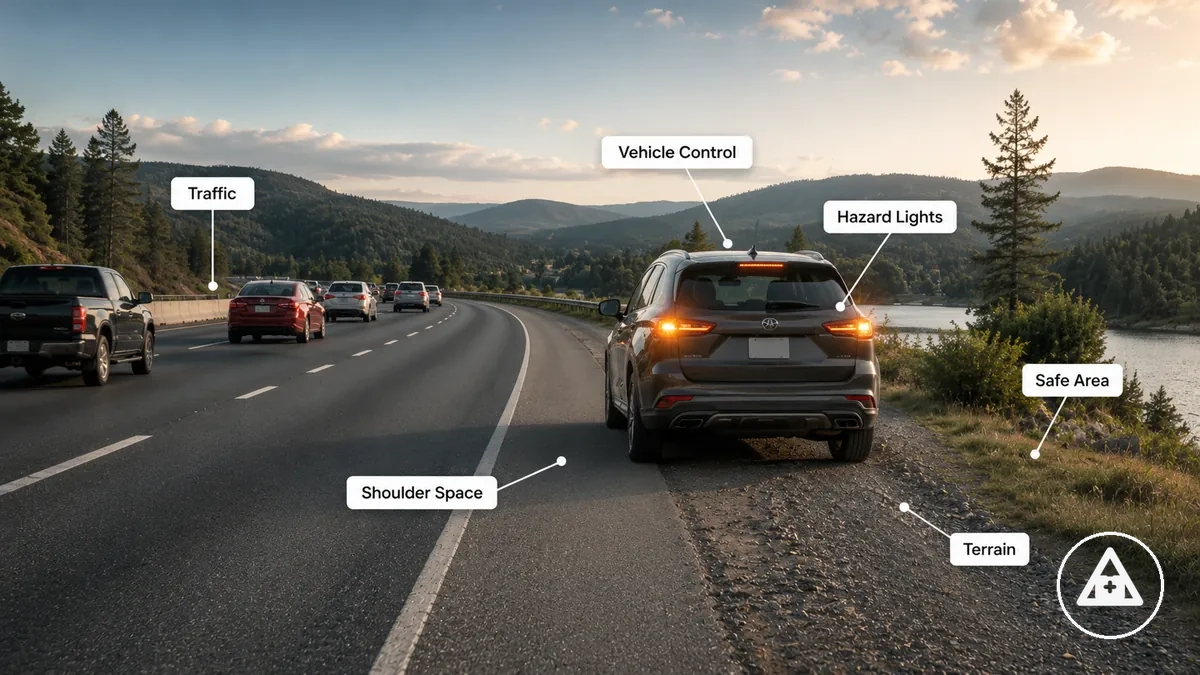
If shoulder space is available, hazard lights are active, traffic speed allows controlled movement, and terrain supports vehicle control, pulling over may reduce traffic exposure. A wider roadside space can improve visibility and create a safer stopping location. Uneven terrain, limited shoulder space, poor visibility, or unstable vehicle control can increase risk.
Personal safety is more important than preserving the exact breakdown location. If traffic, terrain, steering concerns, braking issues, or roadside conditions make movement unsafe, staying put and calling for help may be the safer option.
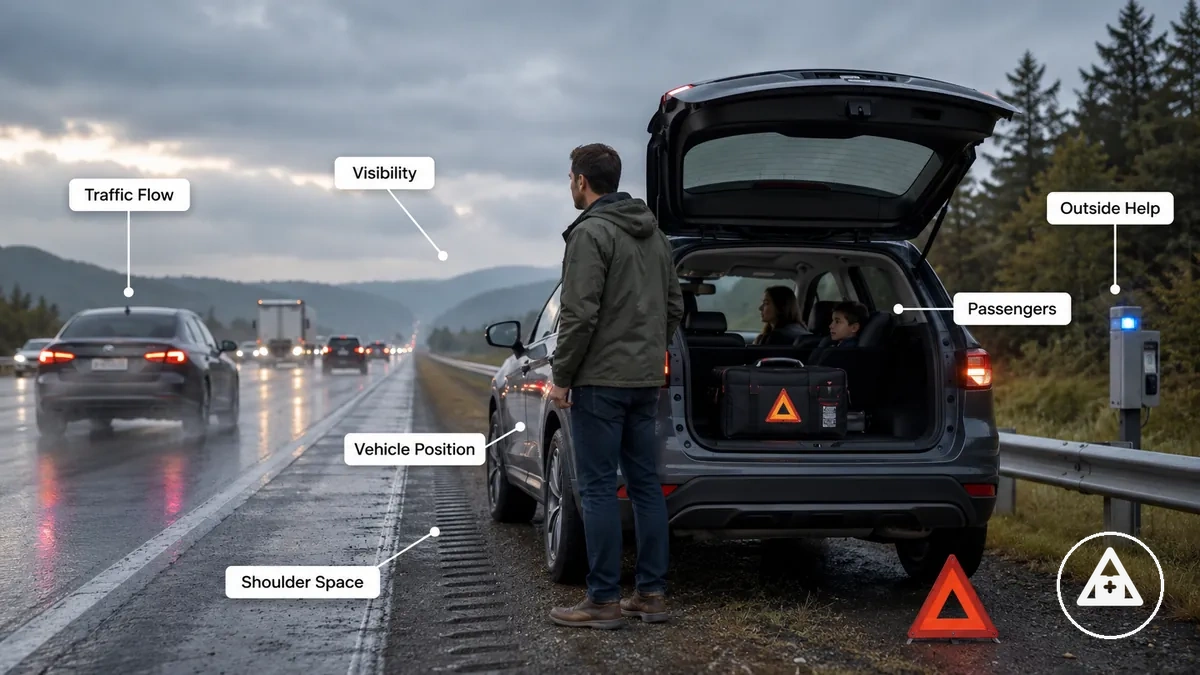
Decide Whether It Is Safer to Stay Inside or Exit
Staying inside or choosing to exit depends on traffic exposure, vehicle condition, vehicle location, and whether leaving the vehicle creates more risk than remaining inside. The decision should be based on current conditions rather than a fixed rule.
Decide whether it is safer to stay inside or exit by evaluating the conditions around the vehicle. The image below highlights the factors that can influence the decision and affect access to external kit items.

- If traffic exposure is high, shoulder width is limited, or vehicles are passing close to the vehicle location, it may be safer to stay inside.
- If smoke, fire signs, fuel smell, or other vehicle-condition concerns are present, exiting and moving away from the vehicle may reduce risk.
- If passengers are vulnerable, night visibility is poor, or weather reduces roadside awareness, remaining in the vehicle may be the lower-risk option when conditions allow.
- If a reachable kit can be accessed without stepping into danger and the roadside space provides separation from traffic, exiting may be reasonable.
- If traffic speed, roadside exposure, or visibility conditions make safe movement uncertain, delaying kit access and reassessing conditions may be appropriate.
Low-speed areas with wider shoulder width can create different conditions from high-speed roads with limited roadside space or reduced visibility. The safer choice depends on how traffic exposure, passengers, weather, vehicle condition, and kit access interact at that location.
Make the Vehicle and Driver Visible
Vehicle visibility and driver visibility should be addressed before attempting minor roadside tasks. Visibility items help other road users recognize the vehicle, identify roadside activity, and respond more effectively in low-light conditions or reduced-visibility environments.
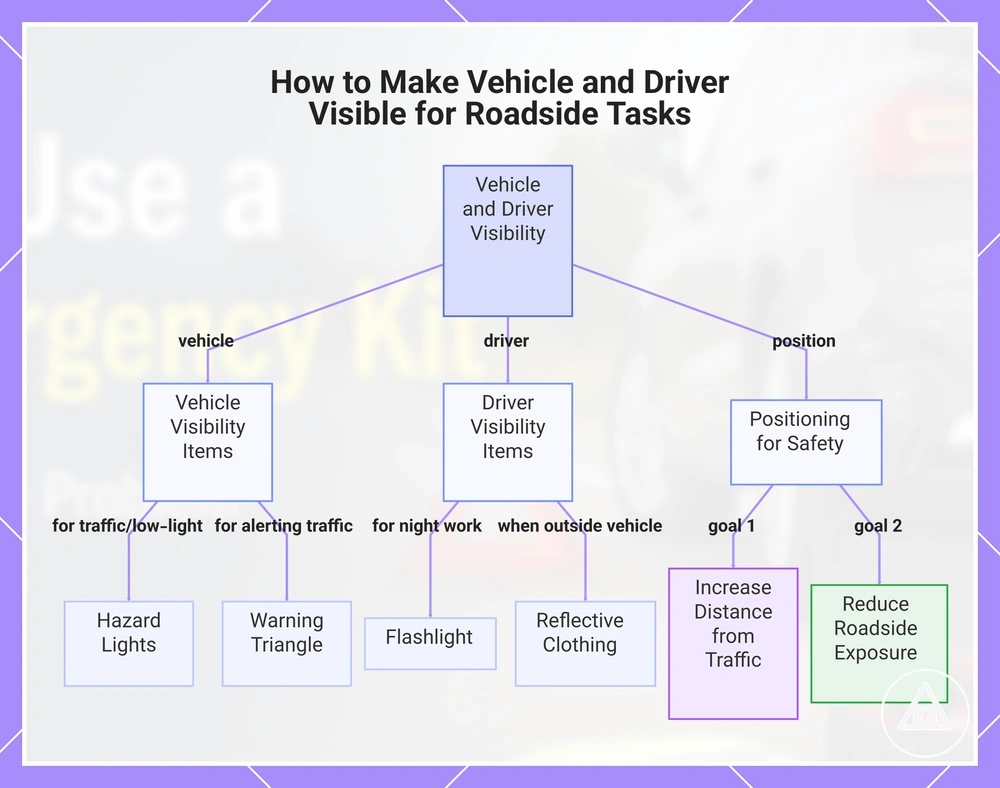
Make the Vehicle and Driver Visible by using visibility items that match the roadside condition. The checklist below organizes visibility actions by item and condition before any non-essential roadside task begins.
- Use hazard lights to improve vehicle visibility when stopped near traffic, during low-light conditions, or when approaching drivers may need additional warning.
- Use a flashlight to improve driver visibility and illuminate the work area, especially at night or in darker roadside locations.
- Wear reflective clothing or reflective gear when stepping outside the vehicle to increase driver visibility.
- Place a warning triangle where it can help alert approaching traffic while maintaining distance from traffic when conditions allow.
- Choose a position that increases distance from traffic and reduces unnecessary roadside exposure before accessing kit items.
Each visibility item connects a condition to an effect. Hazard lights support vehicle visibility in traffic and low-light conditions, a flashlight supports driver visibility at night, and reflective clothing or a warning triangle can improve recognition when roadside exposure increases. For a broader explanation of roadside safety items, see the dedicated guide. This section focuses on using visibility items rather than providing a full safety-items inventory.
Daylight may improve natural visibility, while night, rain, or narrow-shoulder situations can increase the importance of warning gear and maintaining distance from traffic. The appropriate visibility item depends on the condition, the location, and the roadside decision being made.
This chart shows the key visibility items and positioning actions to improve safety before roadside tasks, based on conditions.
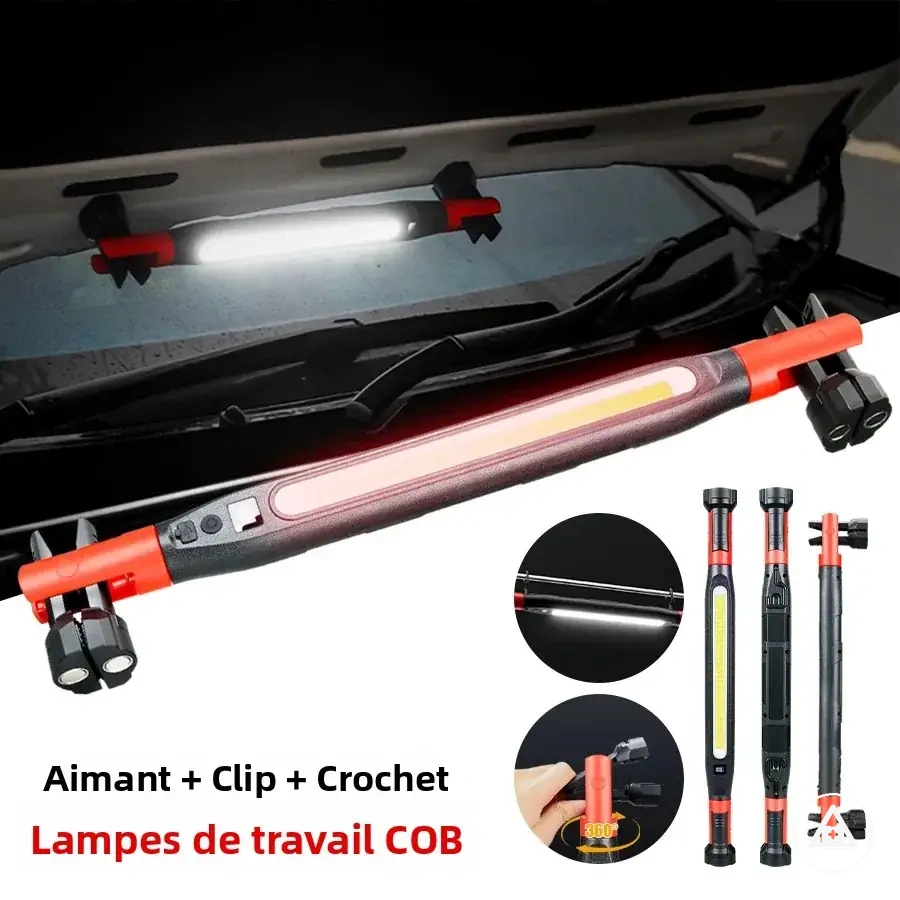
Use Hazard Lights, a Flashlight, and Reflective Gear
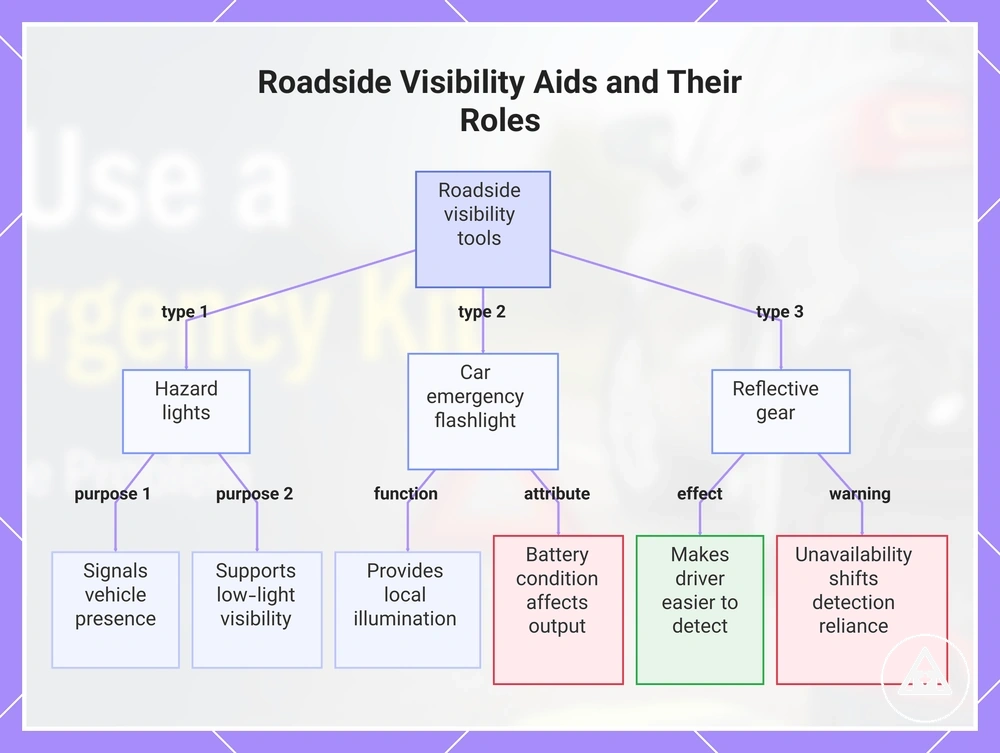
Use Hazard Lights, a Flashlight, and Reflective Gear to improve detection when a vehicle is stopped at the roadside. Hazard lights help other drivers identify the vehicle, while a car emergency flashlight and reflective gear can improve driver visibility in darkness or reduced-visibility conditions.
These visibility tools work together by supporting different parts of detection. Each item has a distinct role, and effectiveness may vary with traffic, weather, battery condition, and surrounding visibility.
- Hazard lights: Hazard lights signal the vehicle's presence and support vehicle visibility when stopped near traffic or in low-light conditions.
- Car emergency flashlight: A car emergency flashlight provides local illumination. Beam direction influences where light is focused, and battery condition may affect visibility during night use.
- Reflective gear: Reflective gear or a high-visibility vest supports driver visibility by making the person easier to detect against the roadside environment.
If battery condition is weak, a car emergency flashlight may provide reduced illumination. If reflective gear or a high-visibility vest is unavailable, driver detection may depend more on available light, vehicle visibility, and the driver's reflective position relative to traffic.
This chart shows three visibility tools used to improve detection when a vehicle is stopped at the roadside, along with their key functions and conditions.
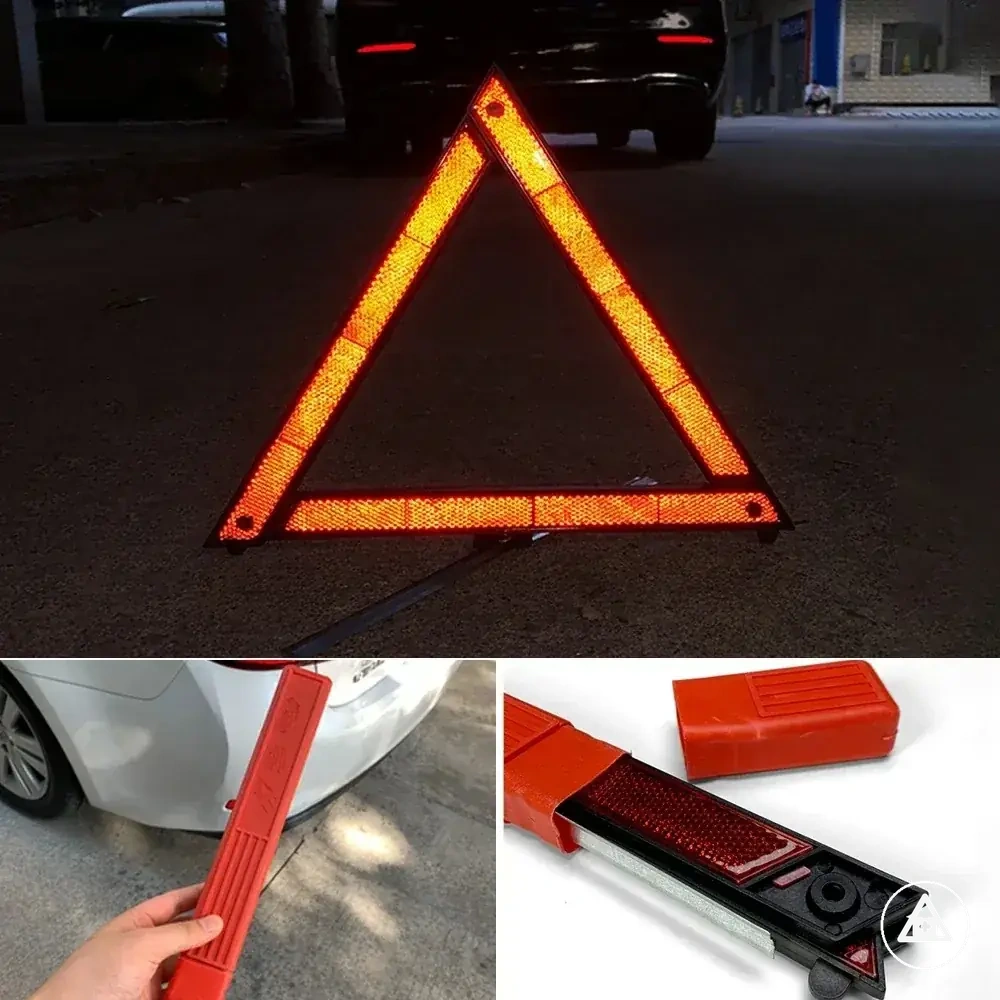
Place a Warning Triangle Only Where It Is Safe and Appropriate
A warning triangle should be placed only if walking to place it is safe. If reaching a placement location increases traffic exposure or creates additional danger, the warning triangle may not be appropriate for that situation.
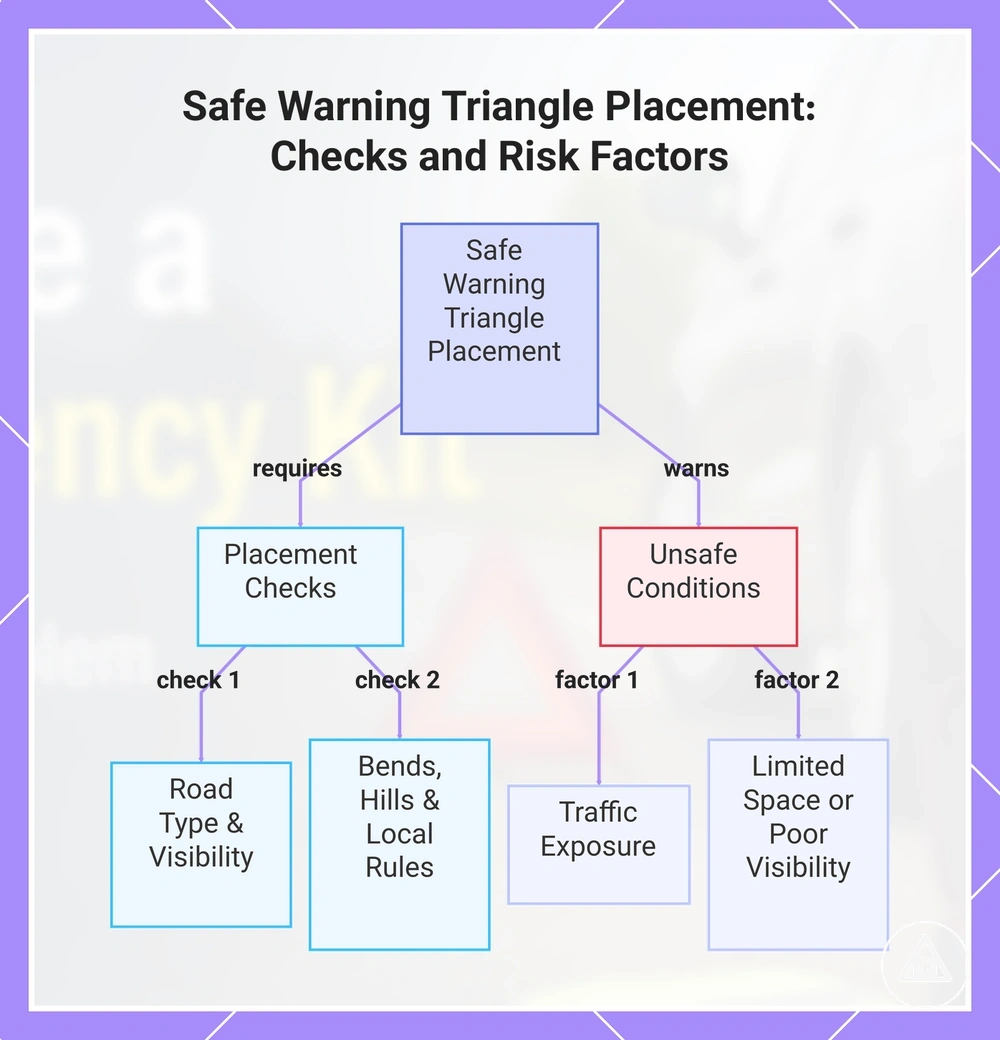
Place a Warning Triangle Only Where It Is Safe and Appropriate by checking the road conditions that affect visibility and safe placement. The checklist below verifies whether the warning triangle can provide warning value without increasing risk to the driver.
- Confirm that safe placement can be completed without unnecessary traffic exposure.
- Consider road type, as available roadside space and traffic patterns may affect placement options.
- Assess visibility distance, particularly where approaching traffic may have limited sight distance.
- Check for bends and hills that may reduce how early the warning triangle becomes visible.
- Review local rules that may influence warning triangle use in the current location.
A warning triangle, reflective triangle, or emergency triangle is most useful when visibility conditions support safe placement. Road type, visibility distance, bends, hills, traffic exposure, and local rules can all affect whether the warning device provides meaningful warning value.
If walking behind the vehicle is unsafe because of traffic exposure, limited roadside space, poor visibility, or other hazards, skip triangle placement and prioritize driver safety.
This chart shows the key checks and risk factors for safely placing a warning triangle on the road.
Use the Right Kit Item for the Immediate Roadside Problem
Use the Right Kit Item for the Immediate Roadside Problem by matching the roadside problem to the most relevant kit item. The roadside problem should determine the kit item, not the other way around. Using the appropriate roadside tool can support a safer outcome while reducing unnecessary actions.
The table below organizes each roadside problem by matching the kit item, condition, and safe limit. For a broader overview of items inside the kit, review the dedicated contents guide before relying on a specific emergency item.
| Roadside problem | Kit item | Safe-use condition | Limit or next decision |
|---|---|---|---|
| Low tire pressure | Tire inflator | Tire condition appears suitable for temporary support | Stop if the tire condition appears unsafe or inflation does not help |
| Flat battery | Jumper cables | Safe setup is available and vehicle manual guidance can be followed | Seek assistance if safe cable use is uncertain or restarting is unsuccessful |
| Minor handling tasks | Gloves | Task involves dirt, rough surfaces, or light handling | Gloves do not replace repair tools or specialized equipment |
| Visibility needs | Flashlight, warning triangle, or reflective gear | Roadside conditions allow safe use of the selected safety item | Prioritize safety if use increases traffic exposure |
| Small roadside needs | Basic supplies | Condition matches the intended purpose of the kit contents | Consider roadside assistance when the situation exceeds the kit's purpose |
Low tire pressure may match a tire inflator when the tire condition allows temporary support. A flat battery may match jumper cables when a safe setup is available and vehicle manual guidance can be followed. Visibility needs may match a flashlight, warning triangle, or reflective gear, while gloves are better suited to minor handling tasks involving dirt or rough surfaces.
A kit item should not be used when the roadside condition is unsafe or falls outside the tool's intended purpose. Tire inflators, jumper cables, gloves, and basic supplies can support limited roadside situations, but they are not a complete repair and may not suit every roadside problem.
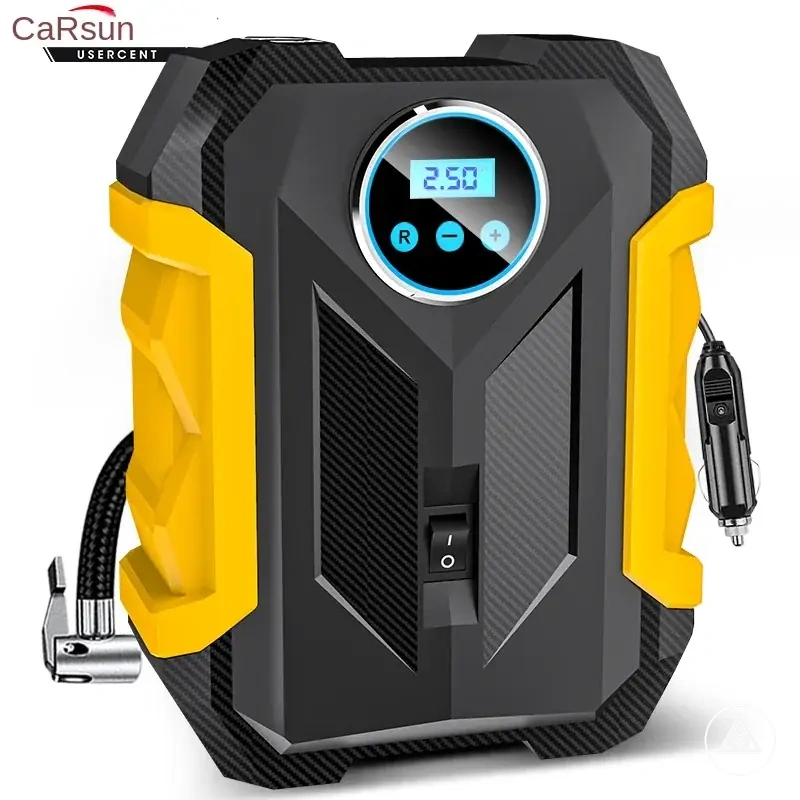
Use a Portable Tire Inflator for Low Tire Pressure
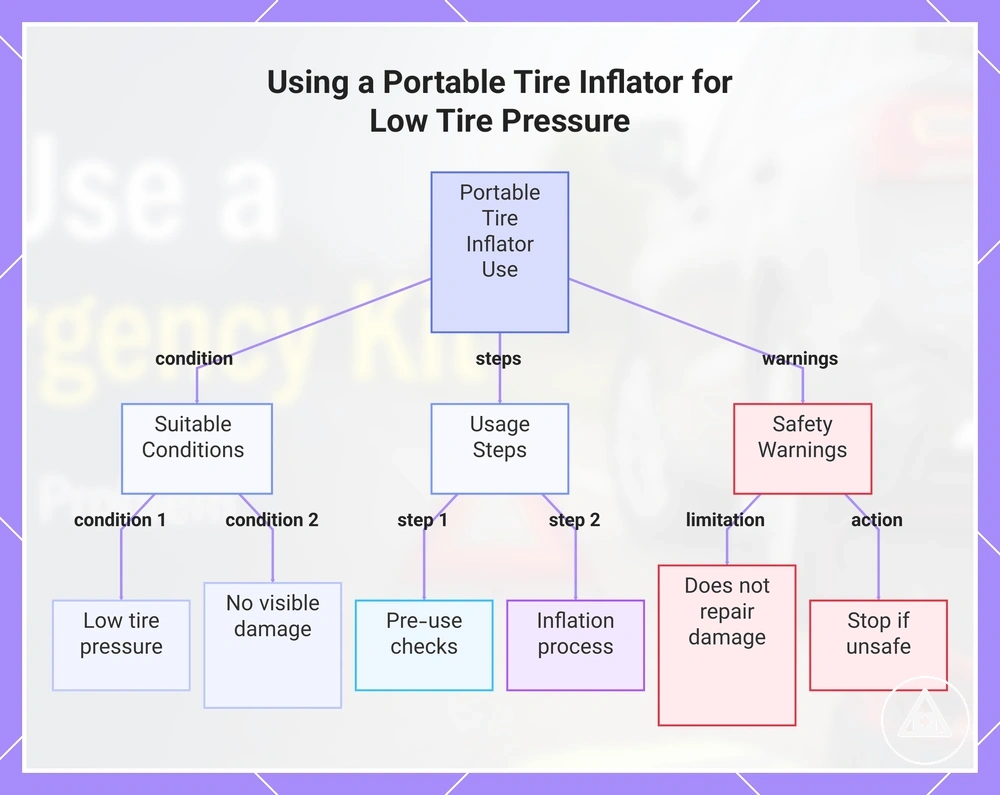
A portable tire inflator is for suitable low tire pressure situations, not visible tire damage. If the tire condition shows sidewall damage, shredding, or another unsafe sign, inflation may not be appropriate. The tire must be safe enough to check before the inflator is used.
Use a Portable Tire Inflator for Low Tire Pressure by working from tire condition to target pressure. Check the vehicle placard or vehicle manual for pressure guidance, then use the steps below to organize the valve, power source, pressure reading, inflation, and stop condition.
- Check the tire condition before connecting the inflator.
- Connect the inflator hose to the valve securely.
- Connect the inflator to the correct power source for the device.
- Read the current pressure reading before adding air.
- Inflate toward the target pressure shown on the vehicle placard or manual.
- Stop using the inflator if the tire will not hold air or the condition appears unsafe.
A portable tire inflator can add air when the tire condition allows temporary support, but it does not repair punctures, sidewall damage, shredded tires, or unsafe driving conditions. Short-distance safety depends on whether the tire holds air, the roadside setting is safe, and the vehicle can be moved without creating additional risk.
If the tire will not hold air, pressure drops again, or the roadside condition makes inflation unsafe, stop using the inflator and call for help.
This chart shows the conditions, steps, and warnings for using a portable tire inflator to address low tire pressure.
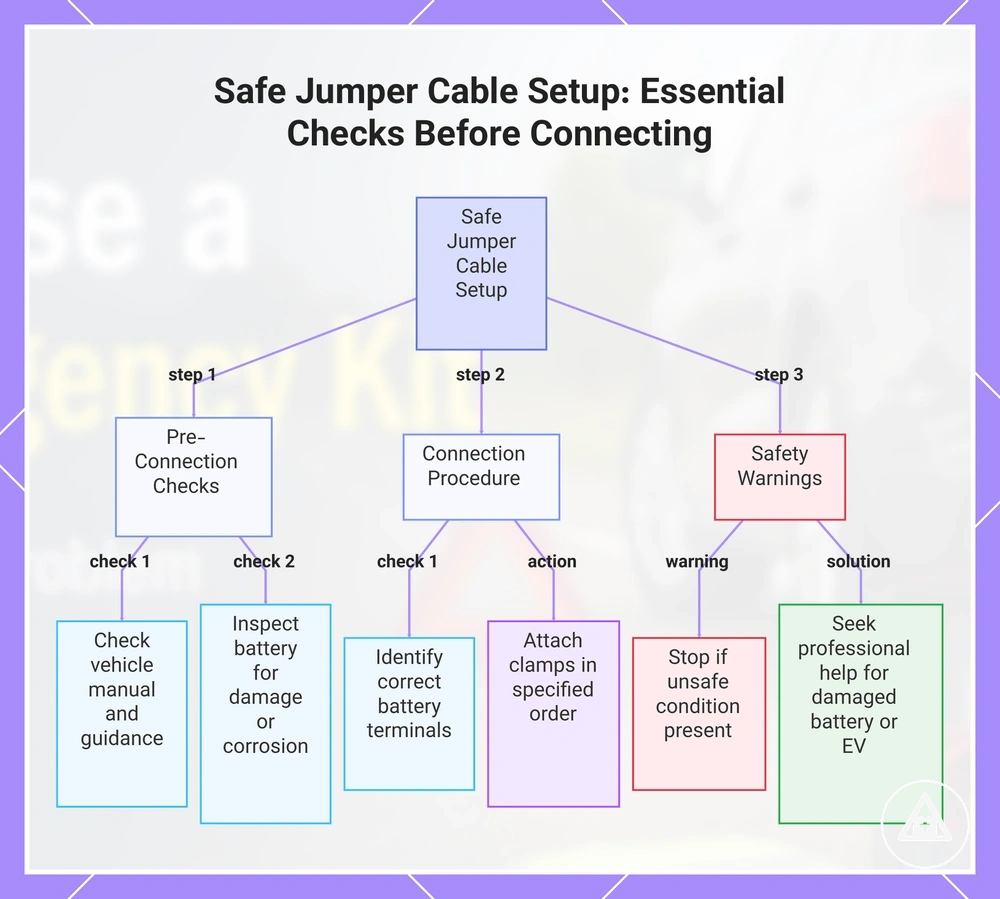
Use Jumper Cables Only With a Safe Battery Setup
Jumper cables should only be used when the safe battery setup is understood and appears suitable for use. Battery terminals, visible battery condition, and vehicle-specific requirements affect whether jumper cables can be used safely. If the setup is unclear, stop before connecting any cables.
Use Jumper Cables Only With a Safe Battery Setup by checking vehicle manual guidance, battery terminals, cable order, and visible battery condition before any connection is made. The steps below organize safe setup checks before using jumper cables, jump leads, or other jump-start cables.
- Check the vehicle manual and manufacturer guidance before handling jumper cables.
- Inspect the battery for visible corrosion, damage, leaks, swelling, or other signs that may make cable use unsuitable.
- Identify the correct battery terminals before attaching any clamps.
- Confirm that the donor vehicle or power source is appropriate for the intended setup and that the connection points are understood.
- Attach and remove clamps only according to the cable order and connection method specified by the vehicle manual or manufacturer guidance.
- Stop if corrosion, damage, sparks, unknown terminals, or another unsafe condition is present.
Professional help may be the safer option when the battery is damaged, battery terminals cannot be identified, sparks occur unexpectedly, or the vehicle is a hybrid vehicle or electric vehicle with vehicle-specific procedures. When the safe battery setup cannot be confirmed, avoid using jumper cables until appropriate guidance is available.
This chart shows the key checks and safety steps to follow before using jumper cables, based on vehicle manual guidance and battery condition.
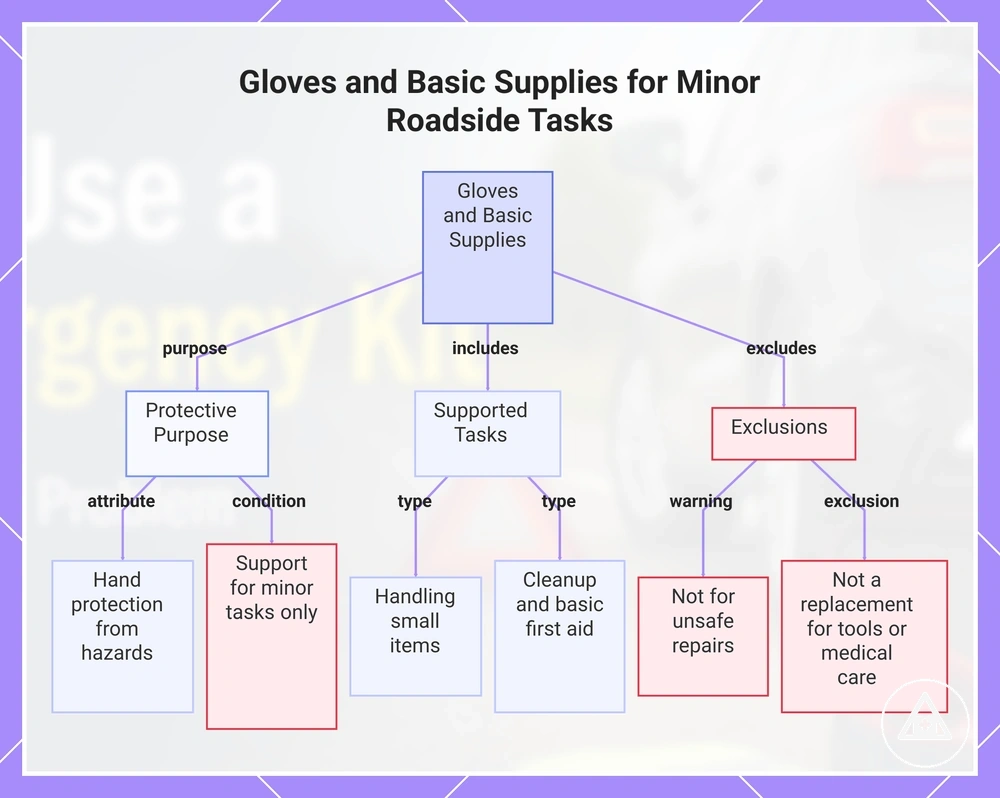
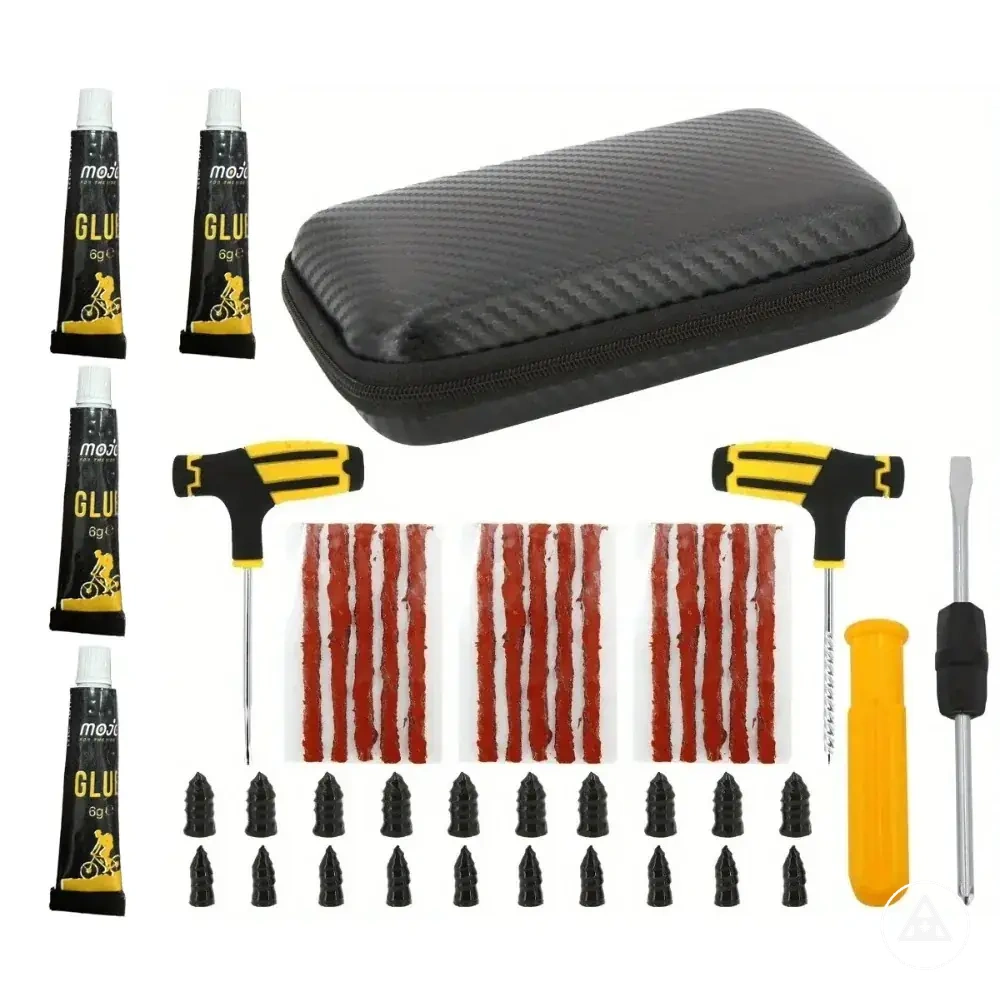
Use Gloves and Basic Supplies for Minor Roadside Tasks
Roadside emergency gloves and basic supplies support protection during minor roadside tasks, not unsafe repairs. Gloves provide hand protection around dirt, sharp edges, and hot surfaces. If a task appears unsafe or exceeds simple handling, it may be better not to attempt it.
Gloves and basic supplies support protective handling when working with small tools, wipes, and other kit items. Roadside emergency gloves can reduce direct contact with dirt, while wipes can help with cleanup after use. Controlled handling is important around sharp edges, hot surfaces, and small items that require care.
Minor roadside tasks that gloves and basic supplies may support include:
- Checking a valve cap while maintaining hand protection.
- Handling a warning triangle during setup or storage.
- Using wipes to remove dirt from hands after handling roadside items.
- Managing dirty items after use before returning them to the kit.
- Using first aid basics for simple support when appropriate, without treating the supplies as complete first aid.
Gloves and basic supplies are intended for protective handling and light roadside assistance. They do not replace vehicle repair equipment, mechanic-level tools, medical treatment guidance, or complete first-aid resources.
This chart shows the protective purpose, supported tasks, and limitations of roadside gloves and basic supplies.
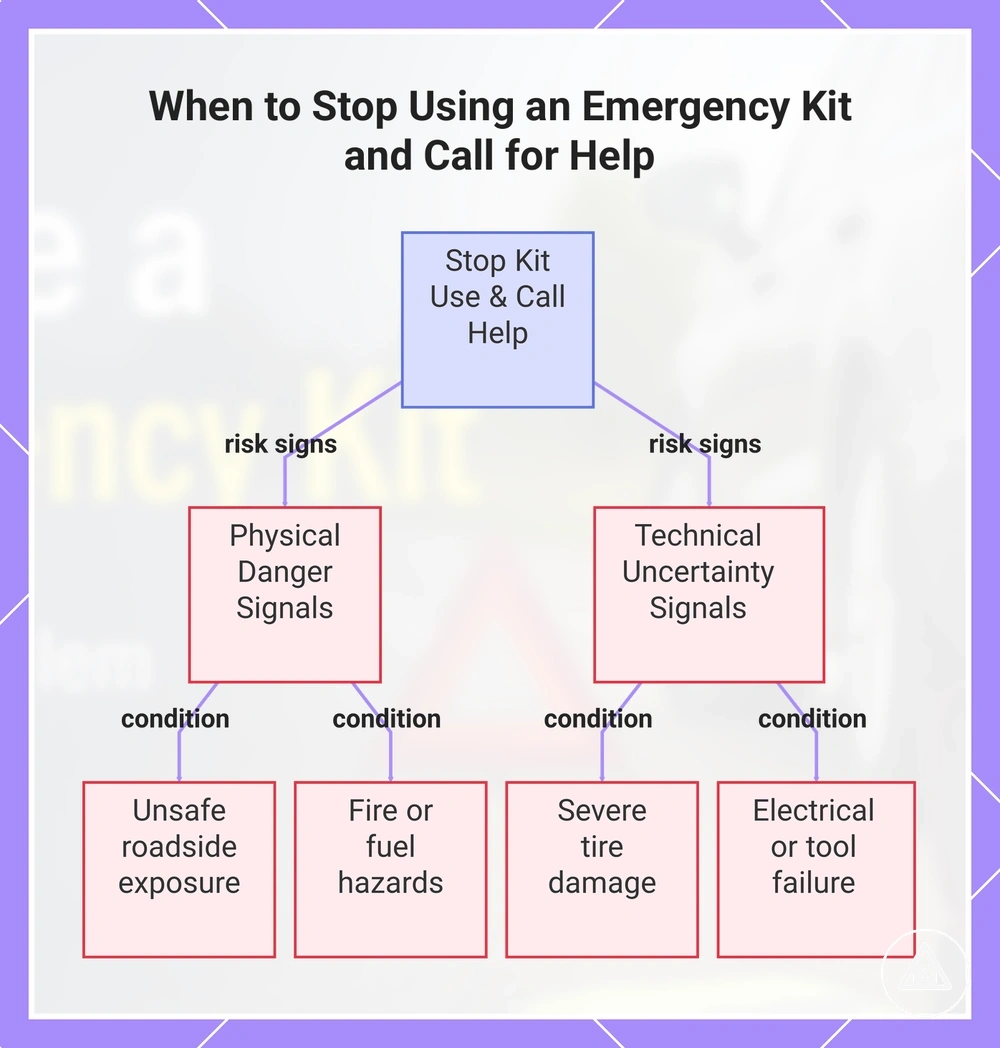
Know When to Stop Using the Kit and Call for Help
Stop using the kit when conditions become unsafe, unclear, or beyond minor roadside support. Risk signs should override the desire to solve the problem at the roadside. Know When to Stop Using the Kit and Call for Help by using the checklist below to identify decision-changing conditions.
- Heavy traffic creates unsafe exposure around the vehicle and may make continued kit use inappropriate.
- Smoke, fire smell, or fuel smell are risk signs that can justify increasing safe distance from the vehicle and contacting emergency services.
- Severe tire damage can indicate that continued roadside intervention is unlikely to provide useful support.
- Electrical uncertainty, battery damage, unknown connections, or unexpected sparks may require professional help rather than further kit use.
- Injury, poor visibility, or weather exposure can increase risk and change whether roadside activity should continue.
- Tool failure or ineffective kit use can be a stop condition when the intended task cannot be completed safely.
Physical danger signals can change the situation quickly. Heavy traffic, poor visibility, weather exposure, injury, smoke, fire smell, and fuel smell may make roadside activity unsafe even when a kit item is available.
Tool or vehicle uncertainty can also justify stopping. Severe tire damage, electrical uncertainty, battery damage, and tool failure may indicate that the situation extends beyond minor roadside support. In these cases, continued attempts may add uncertainty without improving the outcome.
Risk signs are decision signals, not vehicle diagnoses. Roadside assistance or emergency services may be appropriate when safety conditions are unclear, danger signs are present, or professional assessment is needed. A car emergency kit should not be treated as a replacement for professional judgment, roadside assistance, or emergency response.
Practical limits matter as much as the original problem. When stop conditions remain unresolved, when the cause is uncertain, or when safe use of kit items can no longer be confirmed, the safer next step may be to stop using the kit and call for help rather than continue roadside intervention.
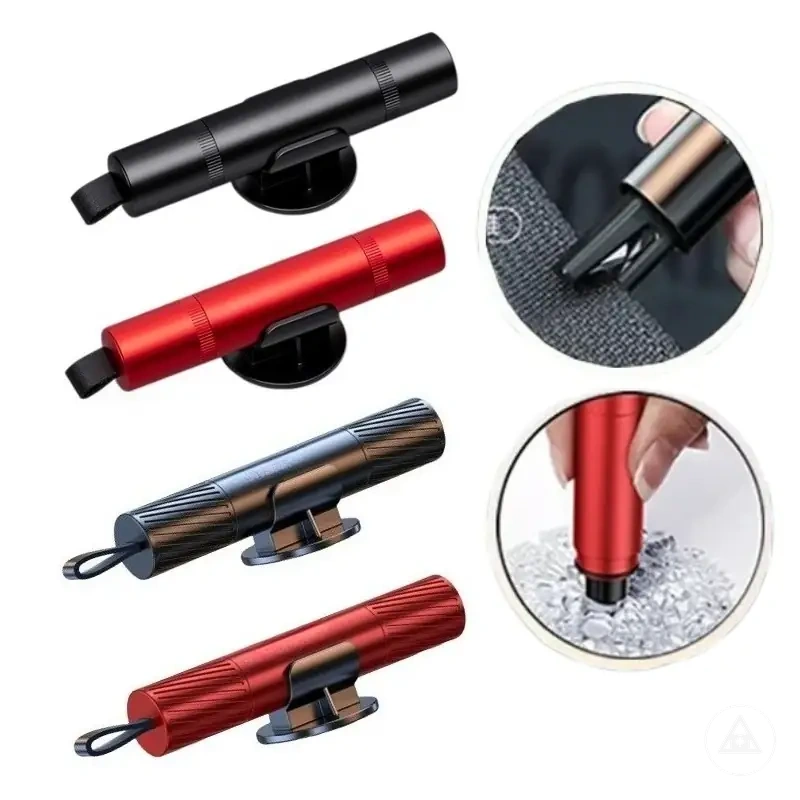
Here are product examples that may make comparison easier. Before buying, always review the compatibility criteria, essential features, and product details.
This chart shows the risk signs that indicate you should stop using the car emergency kit and call for help instead of continuing roadside intervention.
Avoid Common Roadside Kit Use Mistakes
Roadside kit mistakes usually involve unsafe exposure, wrong tool use, or ignoring stop signals. A risky action can make a roadside problem harder to manage and reduce the usefulness of a kit item. Avoid Common Roadside Kit Use Mistakes by recognizing common errors and choosing a safer alternative when conditions change.
The table below pairs each mistake with a safer correction. It organizes common roadside kit use mistakes by correction so that decisions can be adjusted to the roadside condition rather than relying on the tool alone.
| Mistake | Why it increases risk | Safer correction | Condition that changes the decision |
|---|---|---|---|
| Standing near traffic | Reduces separation from moving vehicles and increases exposure. | Move to a safer standing position when roadside space allows. | Heavy traffic or limited shoulder space. |
| Placing warning gear unsafely | Can require unnecessary exposure to traffic. | Use warning gear only when placement can be completed safely. | Poor visibility, traffic exposure, or restricted roadside access. |
| Using damaged cables | May increase uncertainty during jumper cable use. | Inspect jumper cables and stop use if visible damage is present. | Damaged cables, corrosion, or unclear battery conditions. |
| Overusing an inflator | May not address the underlying tire condition. | Reassess tire condition if continued inflation does not help. | Severe tire damage or repeated pressure loss. |
| Ignoring vehicle guidance | Can lead to incorrect setup or unsafe use. | Follow vehicle guidance when available. | Vehicle-specific procedures or unclear compatibility. |
| Poor flashlight positioning | Can reduce visibility around the work area. | Adjust flashlight positioning to improve local visibility. | Night conditions or reduced-visibility environments. |
| Forgetting personal visibility | Makes roadside activity harder for others to detect. | Use reflective items or other visibility measures when appropriate. | Poor visibility, darkness, or weather exposure. |
The appropriate correction depends on roadside conditions and vehicle guidance. A safer alternative may reduce risk but does not remove it entirely. Traffic, personal visibility, tool condition, and uncertainty should guide whether kit use continues, whether a stop condition has been reached, or whether it is time to call for help.
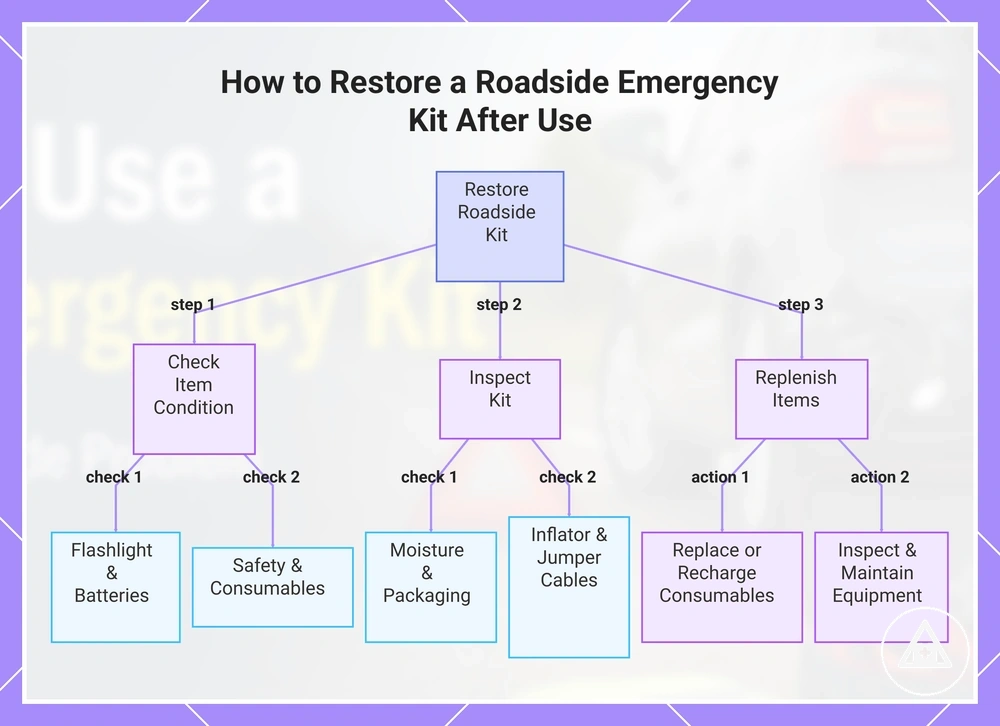
Restore the Kit After the Roadside Problem
Restore the kit after the roadside problem so it returns to a ready state for the next emergency. A post-use check helps identify used, damaged, or missing items before they are needed again. Kit readiness depends on the condition of the items that were used and the supplies that remain.
Item condition checks should focus on flashlight charge, used batteries, warning triangle condition, gloves, and any supplies used during the roadside event. If flashlight charge is low, batteries are depleted, gloves are damaged, or supplies have been consumed, those items may need to be rechecked or replenished before the kit is stored.
For broader guidance on checking kit readiness, review the dedicated maintenance resource. After arriving at a safe location, inspect the kit for moisture, damaged packaging, inflator storage condition, and jumper cable condition. Moisture, worn storage components, or visible damage may affect how well items remain organized and available for future use.
Restore the Kit After the Roadside Problem by using the replenishment checklist below to organize post-use readiness by kit item and condition.
- Used batteries — Replace or recheck if battery condition is uncertain.
- Flashlight charge — Recharge or recheck before storage.
- Gloves — Replace if torn, heavily worn, or no longer suitable for use.
- Warning triangle condition — Inspect for visible damage or missing parts.
- Inflator storage — Confirm the inflator and accessories are stored together.
- Jumper cable condition — Recheck cables for wear, damage, or contamination.
- Missing supplies — Restock items that were used during the roadside problem.
- Moisture — Dry affected items before returning them to the kit.
- Damaged packaging — Replace or reorganize packaging when needed.
Replacement need depends on item condition rather than item type alone. Missing supplies, used batteries, reduced flashlight charge, damaged packaging, moisture exposure, warning triangle condition, inflator storage issues, and jumper cable condition should all be rechecked before the kit is returned to a ready state. Replenishment helps maintain kit readiness for the next emergency.
Here are product examples that may make comparison easier. Before buying, always review the compatibility criteria, essential features, and product details.
This chart shows the three main steps to restore a roadside emergency kit to a ready state after a roadside problem: checking item condition, inspecting the kit, and replenishing items.